Rend Bot Build – New World Season 10 DPS Guide
The Rend Bot Build is a highly requested role in New World Season 10: Nighthaven for the Isle of Night and Hive of Gorgons raids, providing high amounts of Rend, decreasing your targets armor through various Rend abilities and perks, and allow your team to do more damage. This specific version of a Rend Bot also gives empower for your group via Leadership. The presence of a Rend Bot a raid team means all other teammates will be doing increased damage, which can speed up boss kills and enable smooth raid clears. War Hammer is the key weapon that makes the Rend Bot, since it applies 66% Rend between 3 abilities.
Additional Rend builds:
Weapons
Mainhand
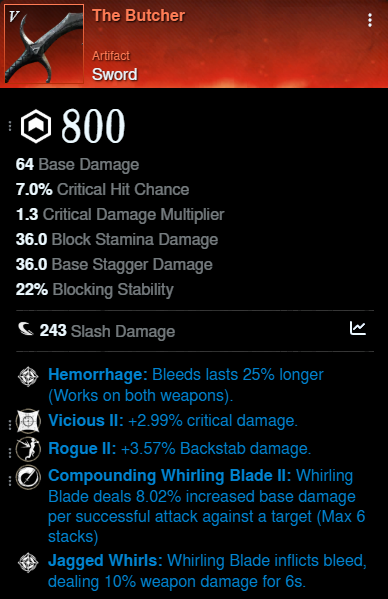
Butcher with:
Compounding Whirling Blade
Vicious
Rogue/Enchanted
Alternative
Sin with:
Vicious
Rogue/Enchanted
If your team already has a Sword with Leadership on each group, you should pick Sin. Just be prepared that this changes which armor perks you need. A Hatchet build needs Keen Berserk at a minimum.
Offhand
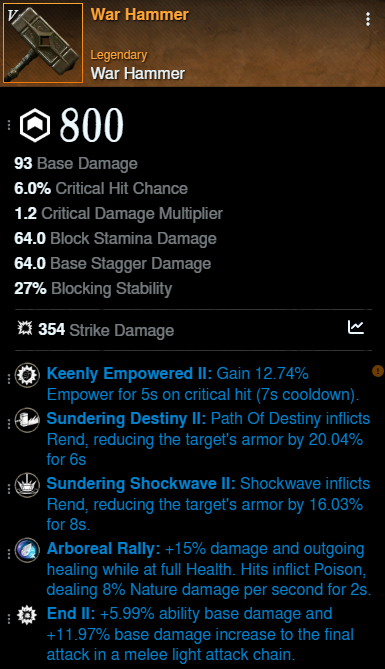
Hammer with:
Sundering Shockwave
Sundering Destiny
End2
Gem slot with Diamond Runeglass
Keenly Empowered
Keenly Empowered on an offhand can be activated by the mainhand weapon, making it a great fit for many builds.
Skill Tree
Offhand for this build is purely to apply rend abilities then switch back to Sword & Shield, so you are giving the Leadership empower bonus to your group. Hammer applies the most rend of these options.
Attributes
| Strength | 350 |
| Dexterity | 150 [fill the rest] |
| Intelligence | 25 |
| Focus | 25 |
| Constitution | 25 |
Armor
This gear serves as a starting point to build upon as some of it may get replaced when you come into Set pieces with infixes. Infixes should replace your least favorite fixed perk on each piece. The Gem slot serves as your defensive piece with an Onyx.
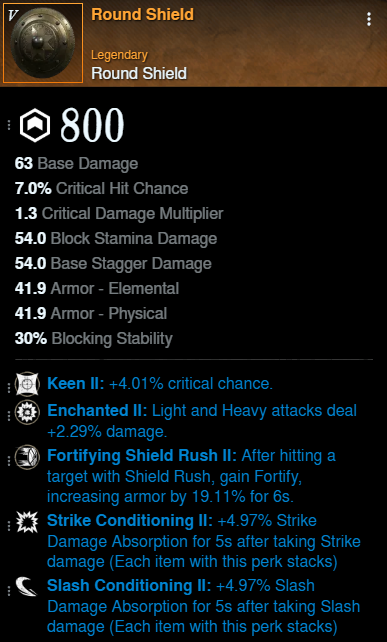
You should remain in a Light weight class for this build to get the +15% damage bonus. While using a Round Shield, you must use all Light armor pieces, and cannot have any Medium weight pieces to attain this. Shield is a must-have so you can have the One With The Shield passive in your skill tree. In Season 10, the recommended artifact changes to either Creed Boots or Lich Gloves.
- Weapon Perks
- Contagious Upheaval
- Fortifying Shield Rush
- Gem Slot
- Fixed Perks
- Lifestealer’s Draught
- Sacrificial Empowerment x2
- Prolonged Favor x2
- Empowering Breaker
- Shirking Energy
- Shirking Fortification x2
Jewelry
Pick the best Protection amulet that matches the most common damage you will be taking in the activity you are in. Assume all perks are the new “II” or “2” versions.
Amulet Perks:
Protection
Well-Being
Leeching
Keenly Fortified
Gem Slot
Ring Perks:
Enchanted Totality
Critical Infliction
Vicious
Leeching
Gem Slot
Earring Perks:
Beloved
Refreshment
Leeching
Offensive Socket
Gem Slot
Some of the Offensive and Defensive sockets are flexible for your to pick the your preferred perk.
Heartrune
Typical Buffs and Trophies
You should ideally have 5 buffs above your health bar, and Major trophies at each of your 3 houses matching the enemy type you are facing. For example:
- 3x Major Angry Earth Trophies – 3×5%(15%) Angry Earth Damage
- Infused Angry Earth Coating – 15% Angry Earth Damage
- Infused Angry Earth Ward – take 10% less damage from Angry Earth enemies
- Powerful Honing Stone – 7% Empower
- Desert Sunrise – reduce duration of incoming DoTs by 25%
- +48 food
How to Play
- Shockwave – AOE Rend/Weaken
- Clear Out – AOE Rend
- Armor Breaker – single Rend
- Switch to Sword & Shield
- Shield Rush – AOE Weaken/Fortify
- Whirling Blade – AOE Damage/DoT
- Upheaval – Damage/Cooldown
- Heavy attack + 3 Light attacks + sword abilities when off cooldown
- One with the Shield perk – Round Shield – Hitting a target will increase the duration of all debuffs on them by 5%
- Once all 3 Hammer abilities are off cooldown, repeat
The whole goals is to make your team do more damage by applying Rends, then give them the extra Empower while staying on your Sword & Shield and using your abilities there until all the cooldowns on your offhand are back up. The rotation with this build will start with War Hammer abilities after the Tank grabs aggro.
Overall this build is pretty easy to run. If you happen to die a lot and need more help surviving, remove some of the attributes from Dex and put them in Con. Since your main task is to help your team do more damage, it’s important you stay alive.
Empower details
| Empowered Stab | 30% |
| Leadership | 10% |
| Honing Stone | 7% |
| Ambush | 10% |
| Oblivion (healer) | 15% |
| Total | 72% |
Empower is capped at 50%, but having more than 50% can help you manage to stay at cap at all times. To know where your current Empower total stands, check out the Empower Calculator.
Hive of Gorgons Tips
During the Lights room, you should be the one to stand on one of the plates that spawn the spiders since you don’t have a ranged weapon.
Echidna – While the bosses stamina is still up, you should stay on the Hammer and cycle in all abilities and heavy attacks since these do the most stamina damage. Once stamina is broken, apply as much Rend as possible and switch to sword to do as much damage as you can. During spikes phase, you should also be using sword since that will be doing the most possible damage.
Typhon – Follow the original rotation and stay on Sword while Hammer abilities are on cooldown. Since other DPS should be using their vines Heartrune to lock down Corvids, save your vines Heartrune for the boss during extended damage phases, like when he gets stunned from breaking a pillar. In that scenario LEAD with vines, then Hammer abilities, since vines have a very fast activation time.
Broodmother Medusa – Bring a ranged weapon because very few teams melee this boss. Otherwise you will be focusing on killing eggs with your Sword. Many times it’s too risky to get close to the boss due to arena Poison and Sleep mechanics. Although if you are able to master surviving in melee range and applying rend to the boss, this could be a huge damage increase for the team. *just don’t become a burden to your healer.
Build made using the free tools at New World Buddy.
For unfamiliar terms, please refer to our terminology guide.